WebAssembly: A new Swiss Army Knife
WebAssembly and its predecessor asm.js provide a portable target for compilation of high-level languages like C, C++, Go, and Rust among others, enabling deployment on the web for client and server applications.
See the Awesome WebAssembly Languages for a curated list of languages that can be compiled to WASM.
It is very important to point out that WASM is not trying to replace Javascript on the web.
According to the WebAssembly FAQ:
WebAssembly is designed to be a complement to, not replacement of, JavaScript. While WebAssembly will, over time, allow many languages to be compiled to the Web, JavaScript has an incredible amount of momentum and will remain the single, privileged (as described above) dynamic language of the Web. Furthermore, it is expected that JavaScript and WebAssembly will be used together in a number of configurations
The video below, from Google I/O 2019, explains how web developers can use WebAssembly with C/C++ and other languages.
Emscripten #
Both C/C++ and Rust use the Emcscripten compiler toolchain, a drop-in replacement for regular compilers in C/C++ and Windows.
The process is broken in three
- Download and prepare Emscripten
- Clone the repository
- Change to the directory you downloaded Emscripten to
- Update the repository if it's not the first time you're using the software
- Update and activate the code
- Use
emsdk installto install the latest version of the SDK - Run
emsdk activateto activate the version you just installed
- Use
- Activate the installation
- Run the
sourcecommand to add theemsdkyou installed. The command issource ./emsdk_env.sh
- Run the
# Clone the repository
git clone https://github.com/emscripten-core/emsdk.git

# Enter the directory where the code is installed
cd emsdk

# Update the repository if this is not the first run
git pull

# Download and install the latest SDK tools.
./emsdk install latest

# Make the "latest" SDK "active" for the current user.
# (writes ~/.emscripten file)
./emsdk activate latest

# Activate PATH and other environment variables
# in the current terminal
source ./emsdk_env.sh
Once we have done this we have the toolchain we'll need for C/C++ and Rust.
C and C++ #
WebAssembly, and asm.js before it, was first created to port C and C++ code to LLVM bit code that could then be converted to Javascript.
If we take this program that will print Hello, World to the screen. save it as hello.c.
#include <stdio.h>
int main(int argc, char ** argv) {
  printf("Hello, world!\n");
}
To convert the hello.c to a WebAssembly file that will play on your web browser run the following command
emcc hello.c -s WASM=1 -o hello.htmlFor those of you familiar with the GCC compiler toolchain, the differences between traditional C/C++ compilation and our WebAssembly compilation are:
- The command is
emccprovided by Emscripten as a replacement for GCC and Clang - The
-sflag passed commands to the transpiler. In this case, we tell it that we want WebAssembly instead of asm.js - the
-o hello.htmltells the compiler to create an HTML file to display the module, a Javascript file with the code to give access to the.wasmcode and the wasm file that contains the binary Web assembly code.
The compilation will produce the following files:
.
├── hello.c
├── hello.html
├── hello.js
└── hello.wasm
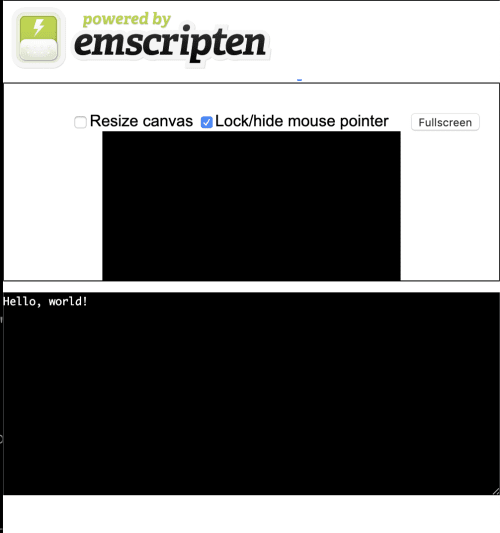
In order to test the project, start a web server and open hello.html in your favorite web browser. They will produce results similar to this:

Emscripten HTML page show results of the code
A more complex example #
As far as examples go, Hello, World is as basic as it gets. While it's good to work out any possible kinks in the system there has to be more we can do with it.
We'll create a function that generates a Fibonacci Sequeence for the number we pass as a parameter.
#include <emscripten.h>

EMSCRIPTEN_KEEPALIVE
int fib(int n) {
  int i, t, a = 0, b = 1;
  for (i = 0; i < n; i++) {
    t = a + b;
    a = b;
    b = t;
  }
  return b;
}
The compilation is a little different too, we do heavy optimizations to the generated code and we pass cwrap as the value of the EXTRA_EXPORTED_RUNTIME_METHODS flag.
cwrap is one of the ways we can call C/C++ from Javascript
emcc -O3 \
-s WASM=1 \
-s EXTRA_EXPORTED_RUNTIME_METHODS='["cwrap"]' \
fib.c
Instead of letting Emscripten generate the HTML file we take that into our own hands. The resulting files from the compilation are listed below
.
├── a.out.js
├── a.out.wasm
└── fib.c
To display the result we need to generate our own HTML. This is better in a way because we don't have to use the pre-built template that looks really ugly.
The important part of the HTML file is the following block. In it we do the following:
- Load the generated Javascript file (
a.out.js) - When the module is initialized we use
Module.cwrapto call the function from the WASM file - Log the result to the console
<script src="a.out.js"></script>
<script>
  Module.onRuntimeInitialized = _ => {
    const fib = Module.cwrap('fib', 'number', ['number']);
    console.log(fib(12));
  };
</script>
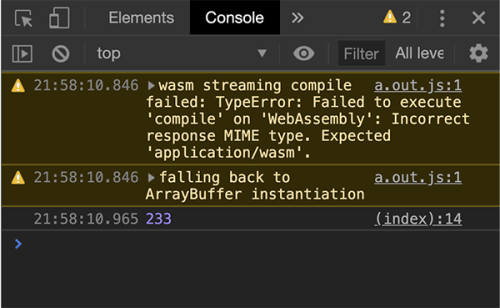
The image below shows the result along with a warning.

Chrome console showing warning and the results of the code
The warning happens because the web server I used (Python 3's built-in HTTP module) doesn't assign the correct mime type for the wasm module. I imagine in production this won't be a problem but during development, you need to take this into account.
Go #
Go is Google's open source language that makes it easy to build simple, reliable, and efficient software.
I'm torn between taking Go or Rust as my second backend language after C++ and it's not an easy decision to make as they both have their advantages and disadvantages
That said, this is the code that we'll use to tests Go's WASM support.
package main

import (
    "fmt"
)

func main() {
    fmt.Println("hello wasm")
}
Unlike C and Rust, support for WASM is baked into the core language runtime. To compile the code into WASM we need to run the following command.
GOOS=js GOARCH=wasm go build -o test.wasm test.goThe GOOS and GOARCH flags tell the compiler what we want to do, we want to compile the file using js as the operating system and wasm as the architecture. This is similar to how we'd compile Go for architectures other than the one we're working on (and, sadly, you have to compile Go for each platform you want to use it for).
In order to run the code we need to copy files from our Go root directory into our current working directory and, if desired, rename the HTML file we copied
cp "$(go env GOROOT)/misc/wasm/wasm_exec.js" .
cp "$(go env GOROOT)/misc/wasm/wasm_exec.html" .
# we rename the html file to index.html for convenience.
mv wasm_exec.html index.html
Go is more strict than Emscripten when it comes to mime types. It refuses to run the wasm file because the mime type is incorrect.
Rust #
Rust is a Mozilla project that seeks to create reliable and efficient software.
There are two ways to get Rust ready to go. The first one is to install rustup, the Rust package manager directly using the following commands
# 1. Download and install rustup
curl https://sh.rustup.rs -sSf | sh

# 2. Install the default version of Rust
rustup install stable

# 3. Make the stable version the default
rustup default stable

# 4. Add support for WASM to your Rust installation
rustup target add wasm32-unknown-emscripten
However, if you are on a Mac and use Homebrew, the commands are a little different. The software to install is rustup-init and it will present you with a series of options for installing or customizing the installation. To being, select option 1 to install the default.
# 1. Install rustup-init with homebrew
brew install rustup-init

# 2. Run rustup-init
rustup-init

# 3. Select option 1 or press enter

# 4. Add support for WASM to your target installation
rustup target add wasm32-unknown-emscripten
We have our Rust toolchain installed and ready to go. Next step is to set up our package.
# Create a new binary package
cargo new hello-world --bin
# Switch to the directory you just created
cd hello-world
The package looks like this:
├── Cargo.toml
└── src
    └── main.rs
Inside main.rs we have the following code that will print Hello World! to the console and then exit.
fn main() {
  // Print text to the console
  println!("Hello World!");
}
We compile this file using the command below:
rustc --target=wasm32-unknown-emscripten src/main.rs -o hello.htmlFirst surprise, the command work when invoked directly from Node but fails when run from a web browser. I discovered that you need special configurations
We have to configure the type of library and dependencies in our Cargo.toml file. It now looks like this:
[package]
name = "hello-world"
version = "0.1.0"
authors = ["Carlos <carlos.araya@gmail.com>"]
edition = "2018"

[lib]
crate-type = ["cdylib"]

[dependencies]
wasm-bindgen = "0.2.44"

[dependencies.web-sys]
version = "0.3.4"
features = [
  'Document',
  'Element',
  'HtmlElement',
  'Node',
  'Window',
]
Next, we install wasm-pack as our compiler rather than using rustc as we did in the previous iteration.
cargo install wasm-packThe final step is to use wasm-pack to build the package for the web
wasm-pack build --target webConclusion #
We now have WebAssembly-ready toolchains for fours languages: C, C++, Go and Rust. So what's next?
The code examples in this post barely scratch the surface of what you can do. Explore the tools, libraries and modules/packages and how they interact when used in WASM code. There is much still to learn.
Don't feel like everything you do on the web now has to be coded in C, Rust or Go and then transpiled to WebAssembly to be used on the web. Like Surma says in his presentation, use WASM to enhance what's already there.
By the way, I got all the code working by uploading it to Github and using Github Pages to run the code from. GH Pages has already taken care of the WebAssembly mime type for me :)
