
Tagging and preparing a Github release
I don't normally do releases of my code. Whatever is on Github is what works and what I use to work with the code.
There are times when a release of code at specific development milestones is necessary (for example when you'd like people to beta test or when it's ready for a 1.0 release). This is a description of my basic process to commit code and create a tag. I can then go in to Github and create a release based on the tags.
Committing code #
The first step is to commit the code. I use the command line Git utility. The command will vary depending on what you want to add.
If you want to add everything
git add .If you want to add a specific file
git add file.extYou can check whether you've committed all the files that you want by using git status. If you have files left to commit, Git will report them as untracked, like in the following example:
On branch master
Your branch is up to date with 'origin/master'.

Untracked files:
  (use "git add ..." to include in what will be committed)
  package-lock.json
  sample.txt

nothing added to commit but untracked files present (use "git add" to track)
If you have no remaining files to commit your git status will look like this:
On branch master
Your branch is ahead of 'origin/master' by 1 commit.
  (use "git push" to publish your local commits)

nothing to commit, working tree clean
Once you've added the code you want to include in the repostitory you must run git commit to push the changes to the Github repository
The -m flag allows you to add the required commit message as an argument to the Git command. Otherwise, you will be taken to the editor defined by your shell to enter the message there.
git commit -m "message for the commit"Creating and committing tags #
Once you commit the changes you're ready to create your tag and prepare a new release from it.
Like most VCSs, Git has the ability to tag specific points in a repository’s history as being important. Typically, people use this functionality to mark release points (
v1.0,v2.0and so on). 2.6 Git Basics - Tagging
To create a tag, with a message for reference, use the folllowing command.
The -a attribute is the name we want to use on the tag.
The -m attributes requires a string for the message that we want to include with the tag.
git tag -a v1.2 -m "message for tag"After you create the tag you need to push it to the repository. This is different than pushing content.
git push origin v1.2Creating a release in Github #
The final step in getting a new version of the project ready for publication is to actually create the release on Github.
Yes, we can tell people to download the code from the tag we created but releases are, or seem to be, more formal and can have a description of the release so people can decide if they want to download it or not.
When you log in to your project in Github, choose tags. You will see a list of all available tags.
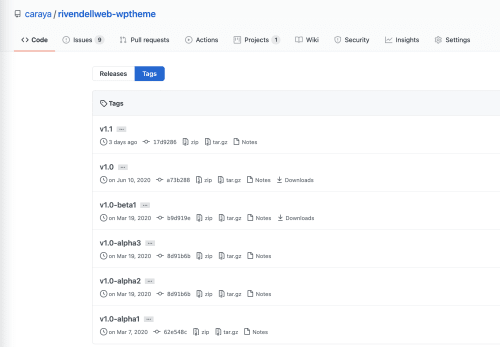
When you switch to releases you will se a list of available relelases on the right of that screen there is a draft a new release button. When you click it the following screen will appear.
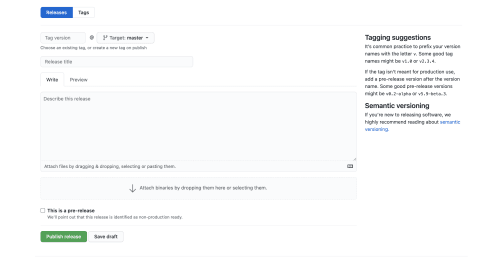
The basic information we need is:
- The tag and branch for the release. Most of the time I'm ok with releasing a tag of the master/main branch
- A description of the release
- Any additional packages that you want to make available as part of the release
- Whether this is a pre release (alpha, beta or preview)
You can publish the release or save it as a draft until you're ready for publishing it.