
Revisiting Web Components (2024 edition)
I've written about web components a lot over the years but not recently. I think it's time to take a look at where we're at, and the newer technologies that have emerged under the web components umbrella.
What are web components? #
Web Components is the umbrella term for a set of technologies (custom elements, shadow DOM and HTML templates) that make it easier to create custom elements for your pages and applications.
A web component may look like this when used in a web document:
<image-gallery></image-gallery>And they would behave the same way as built-in elements like video and audio.
A little bit of history #
The original proposals for web components were presented by Google starting in 2013 with a first draft of custom elements v0
Custom Element V1, the current version of the specifications, was released in 2016. Since then we've had additions and enhancements to the different specifications.
This is where I'll pick up the discussion
Web Components Technologies #
Three core APIs make web components and a few auxiliary APIs make it easier to author and style web components. I've chosen three auxiliary APIs to discuss in this post
HTML Templates, Slots and Declarative Shadow DOM #
The template HTML element allows developers to include content that will not be rendered at page load and can be loaded and displayed programmatically at a later time.
We will use the following example throughout the section.
<template id="my-paragraph">
  <h2>Section Title</h2>
  <p>My paragraph</p>
</template>
While this template contains valid HTML, it will not be rendered to the page until you grab the content with Javascript using something like this code:
let template = document.getElementById("my-paragraph");
let templateContent = template.content;
document.body.appendChild(templateContent);
We can also add the content of the template to a custom element's shadow root. We'll discuss the details later, for now, the code looks like this:
customElements.define(
  "my-paragraph",
  class extends HTMLElement {
    constructor() {
      // always use super() first
      super();
      let template = document.getElementById("my-paragraph");
      let templateContent = template.content;

      const shadowRoot = this.attachShadow({ mode: "open" });
      shadowRoot.appendChild(templateContent.cloneNode(true));
    }
  },
);
The element will only display the content we hardcoded into the template. But let's say that we want to be able to change the title and the content of the paragraph.
To do that, we use the slot element in our templates, we modify our paragraph template by inserting slot elements where we want to customize the content.
The modified template looks like this:
<template id="my-paragraph">
  <h2><slot name="section-title">Section Title</slot></h2>
  <p><slot name="my-text">My default paragraph text</slot></p>
</template>
we can then tailor the content that we display to the user.
If we use the default element, it will display the default material included in the element template.
<my-paragraph></my-paragraph>However, if we use a slot attribute with the same name we defined in the template, it will override the default value with the content we provide.
<my-paragraph>
  <span slot="section-title">Custom Section Title</span>
  <span slot="my-text">custom text for this instance of the custom element</span>
</my-paragraph>
Templates give us a good starting point for custom elements. The next step is to build the element that uses the templates.
Custom Elements #
The custom element API is the core of web components. It defines the element and how it will behave under certain conditions.
The component definition is done with the define method. This method takes two parameters: the element name (must have a hyphen - character in it) and the element definition.
In our example, we use an anonymous class to define the element. This class extends the HTMLElement base class.
We're working with autonomous elements that inherit from HTMLElement, not customized built-in elements that inherit from more specialized elements.
customElements.define(
  "my-paragraph",
  class extends HTMLElement {
    constructor() {
      // always use super() first
      super();
      let template = document.getElementById("my-paragraph");
      let templateContent = template.content;

      const shadowRoot = this.attachShadow({ mode: "open" });
      shadowRoot.appendChild(templateContent.cloneNode(true));
    }
  },
);
Most of the work for this element is done in the constructor method.
We always call the super() constructor. This will make the methods in the base class available to our new class.
We capture both the template element and its content into variables.
We then create a shadow root using its attachShadow method.
Finally, we add the content of our template by inserting a clone of the template content we captured earlier.
Now we have a self-contained element that can be instantiated as many times as necessary.
Custom Elements Lifecycle Elements #
Custom elements provide four life cycle events to react to different events that may happen to the component.
These events are:
- connectedCallback()
- called each time the custom element is added to the document.
- Developers should implement a custom element setup in this callback rather than the constructor.
- disconnectedCallback()
- called each time the element is removed from the document.
- This is where developers should do any teardown necessary for the component
- adoptedCallback()
- called each time the element is moved to a new document.
- attributeChangedCallback()
- Called whenever an attribute whose name is listed in the element's
observedAttributesproperty is added, modified, removed, or replaced. - The element class should also define a static
observedAttributesmethod.
Shadow DOM #
Shadow DOM provides encapsulation for our custom elements with their own structure and interactivity. This is no different from what browser makers do with video, audio, and select elements.
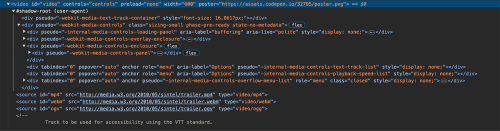
The idea is that, inside our custom element's constructor method we create the shadow root, the base for the element's encapsulated content using the attachShadow method.
TO place the content, we append a clone of the template content element we defined earlier in the constructor.
  const shadowRoot = this.attachShadow({ mode: "open" });
  shadowRoot.appendChild(templateContent.cloneNode(true));
Declarative Shadow DOM
Historically, it has been difficult to use Shadow DOM with Server-Side Rendering because there was no built-in way to express Shadow Roots in the server-generated HTML. There are also performance implications when attaching Shadow Roots to DOM elements that have already been rendered without them. This can cause layout shifting after the page has loaded, or temporarily show a flash of unstyled content ("FOUC") while loading the Shadow Root's stylesheets.
Declarative Shadow DOM (DSD) removes this limitation, bringing Shadow DOM to the server.
To use Declarative Shadow DOM in our custom elements, we have to make a few changes
The first change is to add the shadowrootmode attribute to the template element. This will tell the browser to use the template as the value of the shadow root for the parent element.
<template id="my-paragraph" shadowrootmode="open">
  <h2>Section Title</h2>
  <p>My paragraph</p>
</template>
We still need to create the shadow root, clone the template and attach the clone but the way we do it is slightly different.
Instead of using
let template = document.getElementById("my-paragraph");
let templateContent = template.content;

const shadowRoot = this.attachShadow({ mode: "open" });
shadowRoot.appendChild(templateContent.cloneNode(true));
We use a slightly different version since the one above doesn't work when using Declarative Shadow DOM
const template = document
	.getElementById('my-paragraph-template')
	.content;

this.attachShadow({
  mode: 'open'
}).appendChild(template.cloneNode(true));
This element uses observedAttributes and the attributeChangedCallback lifecycle method to make live changes to the dimensions of the element.
It also uses CSS custom elements, updated from Javascript, to handle the component styles.
static get observedAttributes() {
  return ['width', 'height'];
}

attributeChangedCallback(name, oldValue, newValue) {
  if (name === 'width') {
    this.style.setProperty('--custom-width', newValue);
  } else if (name === 'height') {
    this.style.setProperty('--custom-height', newValue);
  }
}
CSS Parts #
One of the biggest issues with web components is how to style them. Web Components V0 had piercing combinators that would allow styles to pierce to and from the Shadow DOM. Those were removed for V1 custom elements as they were seen as a contradiction to Shadow DOM encapsulation.
CSS Parts, or technically CSS Shadow Parts, use the part attribute in the custom element template to expose the attached element to CSS, and the`::part pseudo-element in CSS to style the exposed element with a matching part name.
To work with parts we need to modify the template and add parts to the elements that we want to style from outside the element.
<template id="my-paragraph" shadowrootmode="open">
  <h2 part="title">Section Title</h2>
  <p part="content">My paragraph</p>
</template>
After the element has been instantiated, we can use CSS to style the exposed parts from our main stylesheet.
The syntax is wordy. It starts with the name of the custom element followed by the ::part pseudo-element and the target part as the attribute.
my-paragraph::part(title) {
  text-transform: uppercase;
  letter-spacing: 0.2px;
}

my-paragraph::part(title) {
  font-weight: 300;
}
Using slots for progressive enhancement #
Most of the time we see web components like this:
<my-paragraph></my-paragraph>This works well when we have internet connectivity, and Javascript is enabled in the browser.
But what happens if it doesn't work?
If we want to use custom elements as designed, we can use slots and named slots when we design the markup for the custom element. If we've added the slot attributes to the template, then whatever content we put in the slots of the element instance will be processed.
These may not be everyone's cup of tea. So let's look for another potential solution
Jim Nielsen (HTML Web Components), Jeremy Keith (HTML Web Components) and Chris Coyier Light-DOM-Only Web Components are Sweet all advocate for a "light DOM" only approach to web components that, in essence, is a way to package progressive enhancement for a given set of markup using web components.
Dave Rupert's HTML with Superpowers presents the theoretical background and Jim Nielsen presents a working example of an HTML, no-shadow-DOM custom element.
The custom element has all the markup inside. We won't be using templates or shadow DOM so all the content we want to display must be inside the element instance.
<icon-list size="md">
  <a href="...">
    <img src="..." width="128" height="128" />
  </a>
</icon-list>
The class that defines the custom element looks like normal. There is no shadow DOM creation or template content attachment; What remains is the lifecycle method that upgrades the custom element.
The element registration works the
class IconList extends HTMLElement {
  connectedCallback() {
    // Add `<input>` controls for changing icon size/spacing
    this.insertAdjacentHTML = `
      <input type=range name=size />
    `;

    // Then event listeners when those values change, e.g.
    this.querySelector("input[name=size]")
      .addEventListener((e) => {
        this.size = e.target.value;
        this._renderSizing();
      });
  }

  _renderSizing() {
    this.querySelectorAll("img").forEach(img => {
       // swap out the `src` and `srcset`
       // and change `width` and `height`
    });
  }
}

customElements.define("icon-list", IconList);
Because we don't use shadow DOM, we can store the CSS for the custom element along in the site's CSS stylesheets.
icon-list {
  /* styles */
}
icon-list[size="sm"] {
  /* styles for 64px sized icons */
}
icon-list[size="md"] {
  /* styles for 128px sized icons */
}
icon-list[size="lg"] {
  /* styles for 256px sized icons */
}
icon-list[size="xl"] {
  /* styles for 512px sized icons */
}
This is no different than what we would normally do:
- Add the Javascript code as functions either inline or an external script
- Add the CSS to stylesheets either inline or external stylesheets
- Add the HTML inside a
divinstead of a custom element
In the end, it's up to each developer to choose which method to use.
Links and Resources #
- Parts of Web Components:
- Declarative Web Components
- HTML Web Components — Jim Nielsen
- HTML Web Components — Jeremy Keith
- A Web Component Story — Cory LaViska
- Blinded By the Light DOM — Eric Meyer
- Light-DOM-Only Web Components are Sweet — Chris Coyier