
Automating accessibility testing
In a previous post, we looked at the top accessibility issues reported in the WebAIM Million [2022 report](https://webaim.org/projects/million/), how to create accessible content, and how to test and repair accessibility errors. In this post, we'll look at different ways and tools to automate detecting accessibility issues rather than evaluating pages one at a time. Finally, we'll look at ways of automating testing in Github repositories using Github Actions. ## Web-based accessibility testing The easiest way to test if a site has accessibility issues is to run it through a web-based accessibility tool. The simplest one to use is the [Axe browser extension](https://www.deque.com/axe/browser-extensions/) from [Deque](https://www.deque.com/). While the extension will only work on single pages, it is far easier to run. To start, download the extension from the [Chrome Store](https://chrome.google.com/webstore/detail/axe-devtools-web-accessib/lhdoppojpmngadmnindnejefpokejbdd).  The extension will add a menu option to the browser's DevTools. To get to the menu, activate DevTools either by pressing `CMD/CTRL + Shift + I` or right-clicking on the window and selecting `Inspect`. 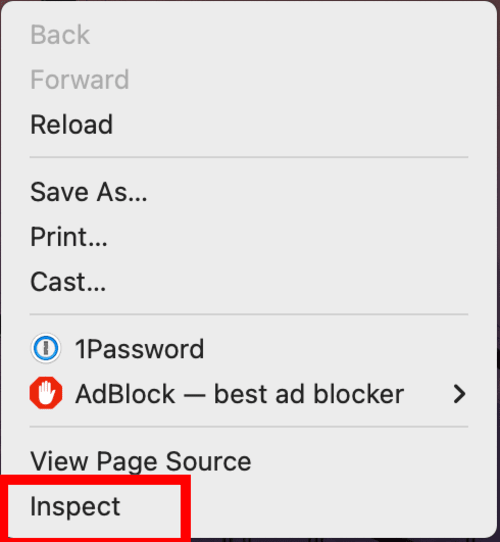 In the DevTools window, the axe DevTools will be at the far right of the menu as shown in the following image: 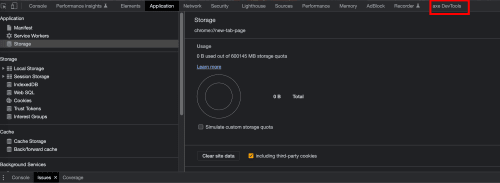 When you click on the menu item you will see the Axe extension main window. **The extension, as downloaded, will only run full-page basic scans. To run the partial scan or any of the specialized scans you must register for the paid version of Axe**. There is also a 14-day trial for you to test the tool and see if it meets your needs. 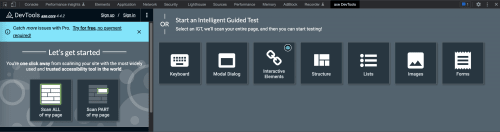 Once you click on the left-side `Scan ALL of my page` button the extension will scan your page for accessibility issues and present them on the right side of the screen as shown in the following image: 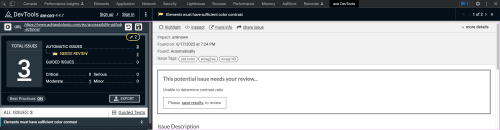 Alongside the automated problems, the extension will suggest how to fix them. [Accessibility Checker](https://www.accessibilitychecker.org/) and [WAVE – Web Accessibility Versatile Evaluator](https://wave.webaim.org/) provides web-based tools for testing and evaluating accessibility. These tools will work with full websites, not individual pages but they require a public web server to run the tests, they will not work in local development environments. The accessibility evaluator tool has one special characteristic: It can use the accessibility standards from multiple countries and regions; these standards may be different from US-based standards. 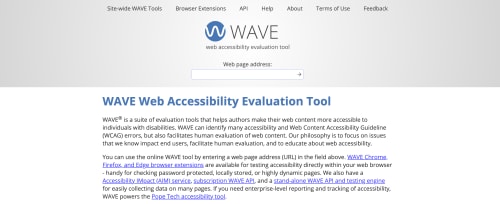 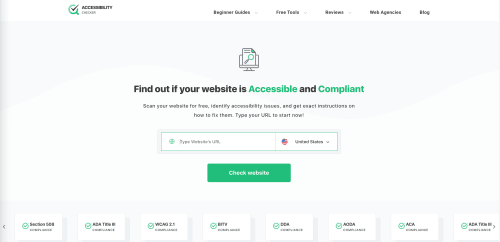 ## Manually accessibility testing The [Axe Core CLI](https://github.com/dequelabs/axe-core-npm/blob/develop/packages/cli/README.md) tool provides a command-line interface to the Axe Core library. Install the library as a global NPM package: ```bash npm install axe-core-npm --global ``` This will make the `axe` command globally available. If your app runs a server, you can start the server and run Axe-core against it. ```bash # starts the server npm start # The example assumes the server # is running at http://localhost:3000 # runs axe against the server axe http://localhost:3000 ``` ## Using Github Actions for accessibility testing The last method to test for accessibility is to use [Github Actions](https://docs.github.com/en/actions) with a variety of accessibility evaluation tools. This will allow us to test for accessibility any time we push new content or there is a pull request into the repository. The Axe action makes the following assumptions * The project uses a Node.js build system * There is an `npm build` command that will build * The project runs a server when you run `npm start` With these assumptions, the action does the following: 1. Chooses when the action will run. In this case, it will run on new push and pull requests to the repository 2. `jobs` defines the tasks that this action will run and the order the tasks will run on 3. We set up the agent to run the tests in `macOS 11`, also presented as `macos-latest` 4. The `strategy` section presents the different versions of Node that we will use for the action. 1. The `matrix` element controls the different combinations of Node versions that we will use 2. `node-version` is an array of one or more versions of Node.js we want to use 5. Next we use the `actions/checkout` action to checkout the code from the repository 6. We use the Node.js version specified in the `matrix.node-version` to run the tests 1. We then configure the version of Node that we'll use 7. This step performs the following tasks 1. The `npm ci` command performs a clean installation of the files in `package.json` 2. it then runs the build command with the [\--if-present](https://docs.npmjs.com/cli/v8/commands/npm-run-script#if-present) flag. The `--if-present` flag will error out if the build command is not present 8. It then runs the Axe commands 1. It installs `@axe-core/cli` as a global NPM package 2. It runs the Axe binary on the server (`https://localhost:3000`) ```yaml name: Axe # 1 on: push: branches: [main] pull_request: branches: [main] # 2 jobs: axe: # 3 runs-on: macos-latest # 4 strategy: matrix: node-version: [16] steps: # 5 * uses: actions/checkout@v3 # 6 * name: Use Node.js ${{ matrix.node-version }} uses: actions/setup-node@v3 with: node-version: ${{ matrix.node-version }} cache: "npm" # 7 * run: npm ci * run: npm run build --if-present * run: npm start & npx wait-on http://localhost:3000 # 8 * name: Run axe run: | npm install -g @axe-core/cli axe http://localhost:3000 --exit ``` With this action in place we get an accessibility report every time we get new content in the repository. We can go a step further and cause the action to fail and block the desired change. I've chosen not to do it in this demo.